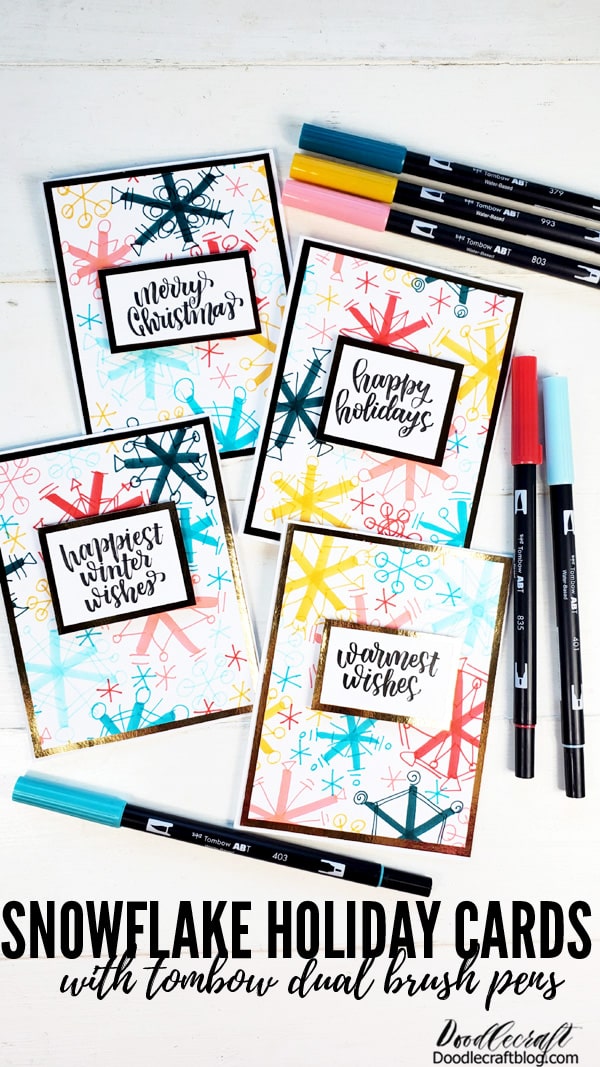
How to Make Snowflake Holiday Cards

How to Make a Snow Holiday Card with Double Tombow Pens |
There is something magical in making holiday cards with your own hands. Today Tombow has the perfect VIP club box with everything you need for the perfect Snowflake holiday card. This adorable postcard is perfect as a gift for a postman, fancy label or gift card holder.
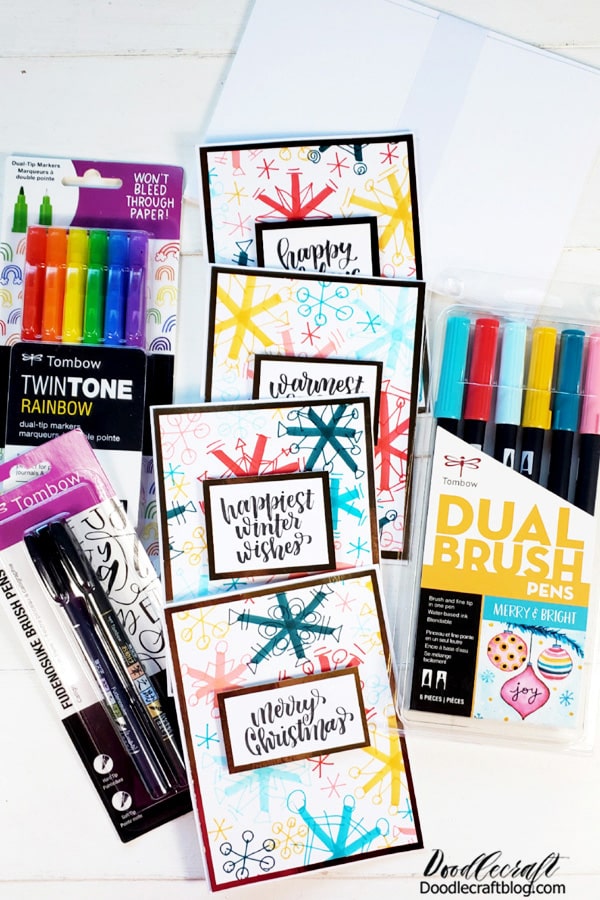
Materials needed for this snowy holiday card:
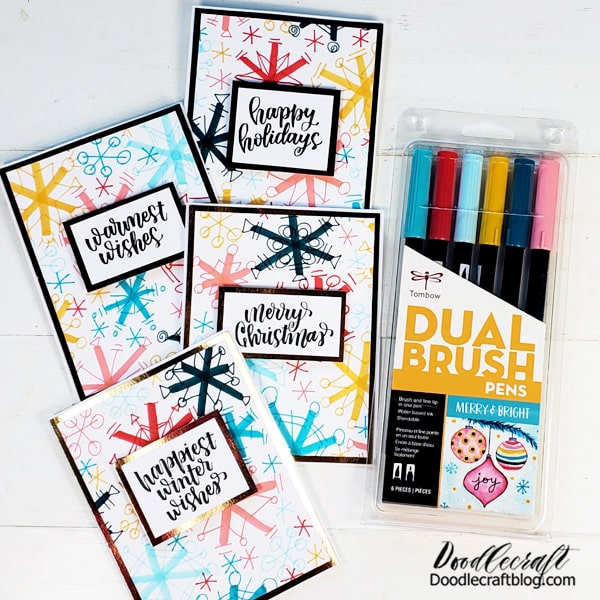
Tombow Merry and Bright Twin Brush, 6 each (available in VIP package)
Tombow Fudenosuke Pen (available in VIP package)
Tombow glue roll
golden paper
white card
Installation of foam on the grave

Introducing a 30-minute video of the process completed in 2 minutes!

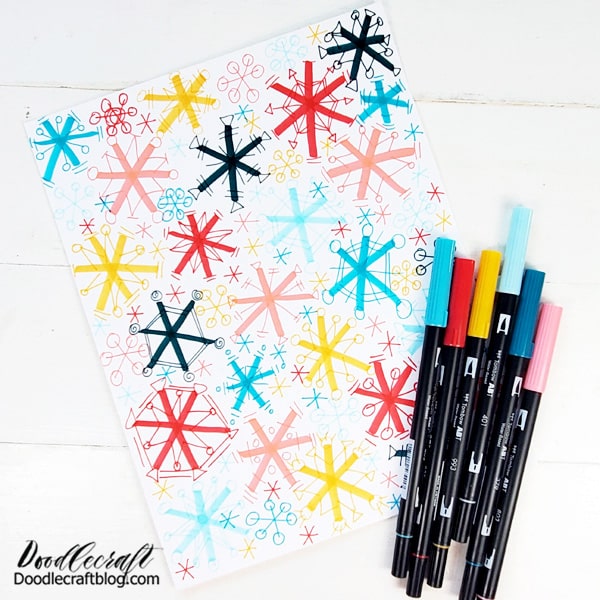
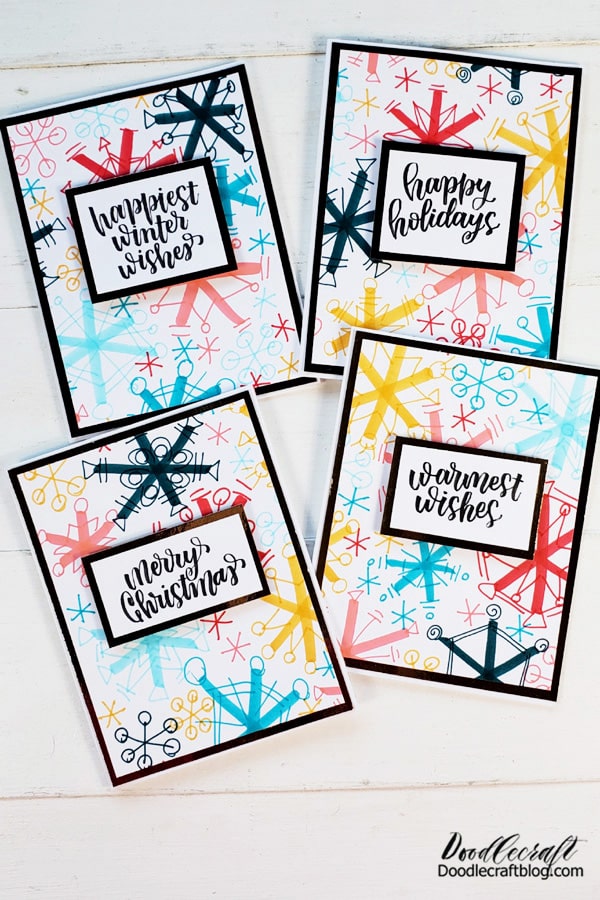
Step 1: Snowflakes
Start by inserting a white cardboard sheet with retro snowflakes into a fun, shiny pen with a double brush. No need to be too careful and cautious.

I love these retro style snowflakes with thick and thin lines. Large circles, stripes and bumps. This is a perfect snow background.
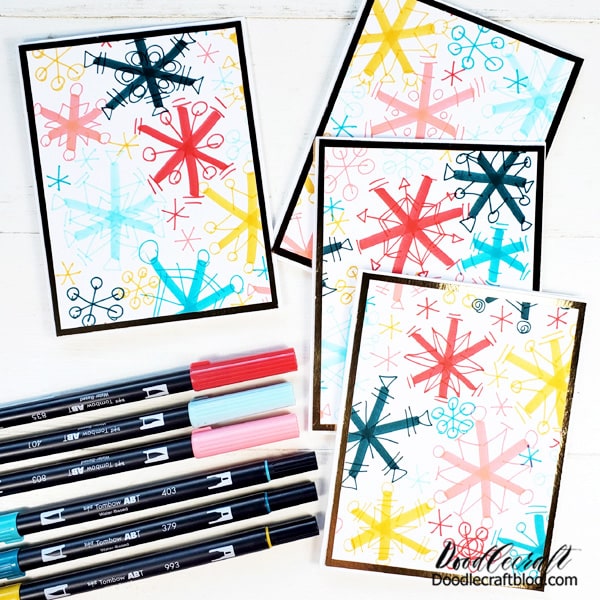
Step 2: Cut the paper
Now that the page is full of snowflakes, cut them into quarters and remove the extra 1/4 inch from each edge.

Cut a gold card 1/8 inch larger than snow paper and fold it together. Then cut 2 pieces of cardboard in half and fold them in half to make a perfect paper. again a small stock.
The cards are very beautiful and can be refined as is ... or we could go a step further by feeling them.
Step 3: Sense the script
Use a fudenosuke brush and write down the festive mood. I love writing “Merry Christmas”, these words are very similar to each other. What other holiday greetings do you like?

Then separate the feelings and layers and glue them to a gold card with a 1/8 "border.
Step 4: Press Styrofoam
Finally, apply the foam to the back of the handwritten flannel and stick it to the retro snow map. They look great and done!
Layers are perfect for sending to USPS mail, so there’s no need to undo or add extra stamps.
Cheerful and bright 6-pair brush is a very unconventional, but functional holiday color palette. I love pink with blue and yellow! What do you think of this color palette?
The VIP box comes with many beautiful consumables. This will be a great gift for those who want to be creative ... or perfect for creating holiday gifts - postcards, stickers and products. In addition, the bag is versatile for carrying accessories from one place to another.
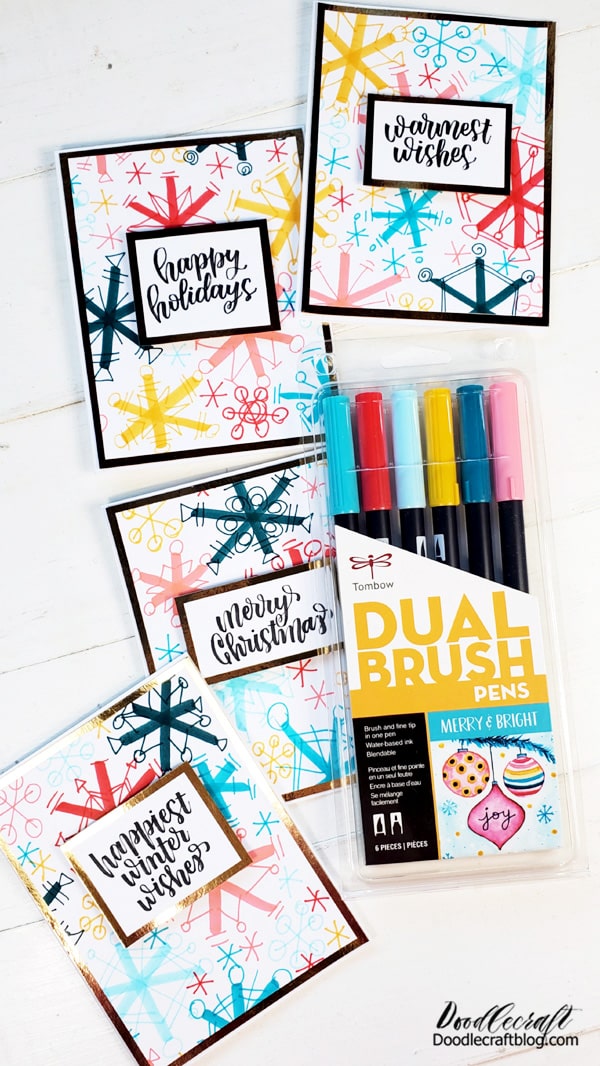
TwinTone markers are preferred for taking notes, keeping a journal, or writing letters. I love watercolors, wallpapers, brushstrokes and more. I like the double brush for. The Fudenosuke pen is my favorite Tombow set.
They are the best for writing and calligraphy, the size is perfect ... I love it in only 100 colors!
Get the VIP Club Box today before it goes on sale!

Here he is!
Like and share!