How to: doll size crate shelf/bookcase
Wow, can’t believe I’m back with another craft. This is my fourth penultimate craft of the year, which is quite rare as I usually do it on the blue moon. I'm not complaining about it, I'm happy about it. I originally started this blog with the idea of making Monster High dollhouse furniture, but it never happened. You know life got in the way, and I didn’t. Also, in the old house I had little space. Now that I’m in a new realm, I’ve had more free time and I want to use it.

When I started working on my strengths: painting, I realized that I lacked doll furniture. I had a few ideas in mind, such as the publication of Upcycling Part 2, but couldn’t find the right items. After working on colored boxes, I thought that maybe you can make a shelf out of boxes, because they are very easy to make. I remembered that My Froggy Stuff recently did something similar, so I watched his video for inspiration. Here is the video.
I did watch the video when he downloaded it, and more or less remembered what he did. I was very anxious to find the right size, so I checked again to see if my boxes were the same size of them. Make it 2 3/4 inches or 6.99 inches. My breasts were 8cm so there wasn’t much difference. To get a rough idea of the size of the shelf, I assembled the boxes I had and took pictures with the doll for review.

This is the third article I’m writing about trunks, so I don’t think you need to go too far. The way Froggy makes the boxes is almost the same as they are made, but there are a few differences. I don’t think my method is better than the other, but I think you’d be interested to see the difference - choosing the technique that works best for you.
I start by sticking 5 sticks 7 cm long on the table. It is easier for me to work if I can mark both sketches at the same time. Then I measure the wand that passes.
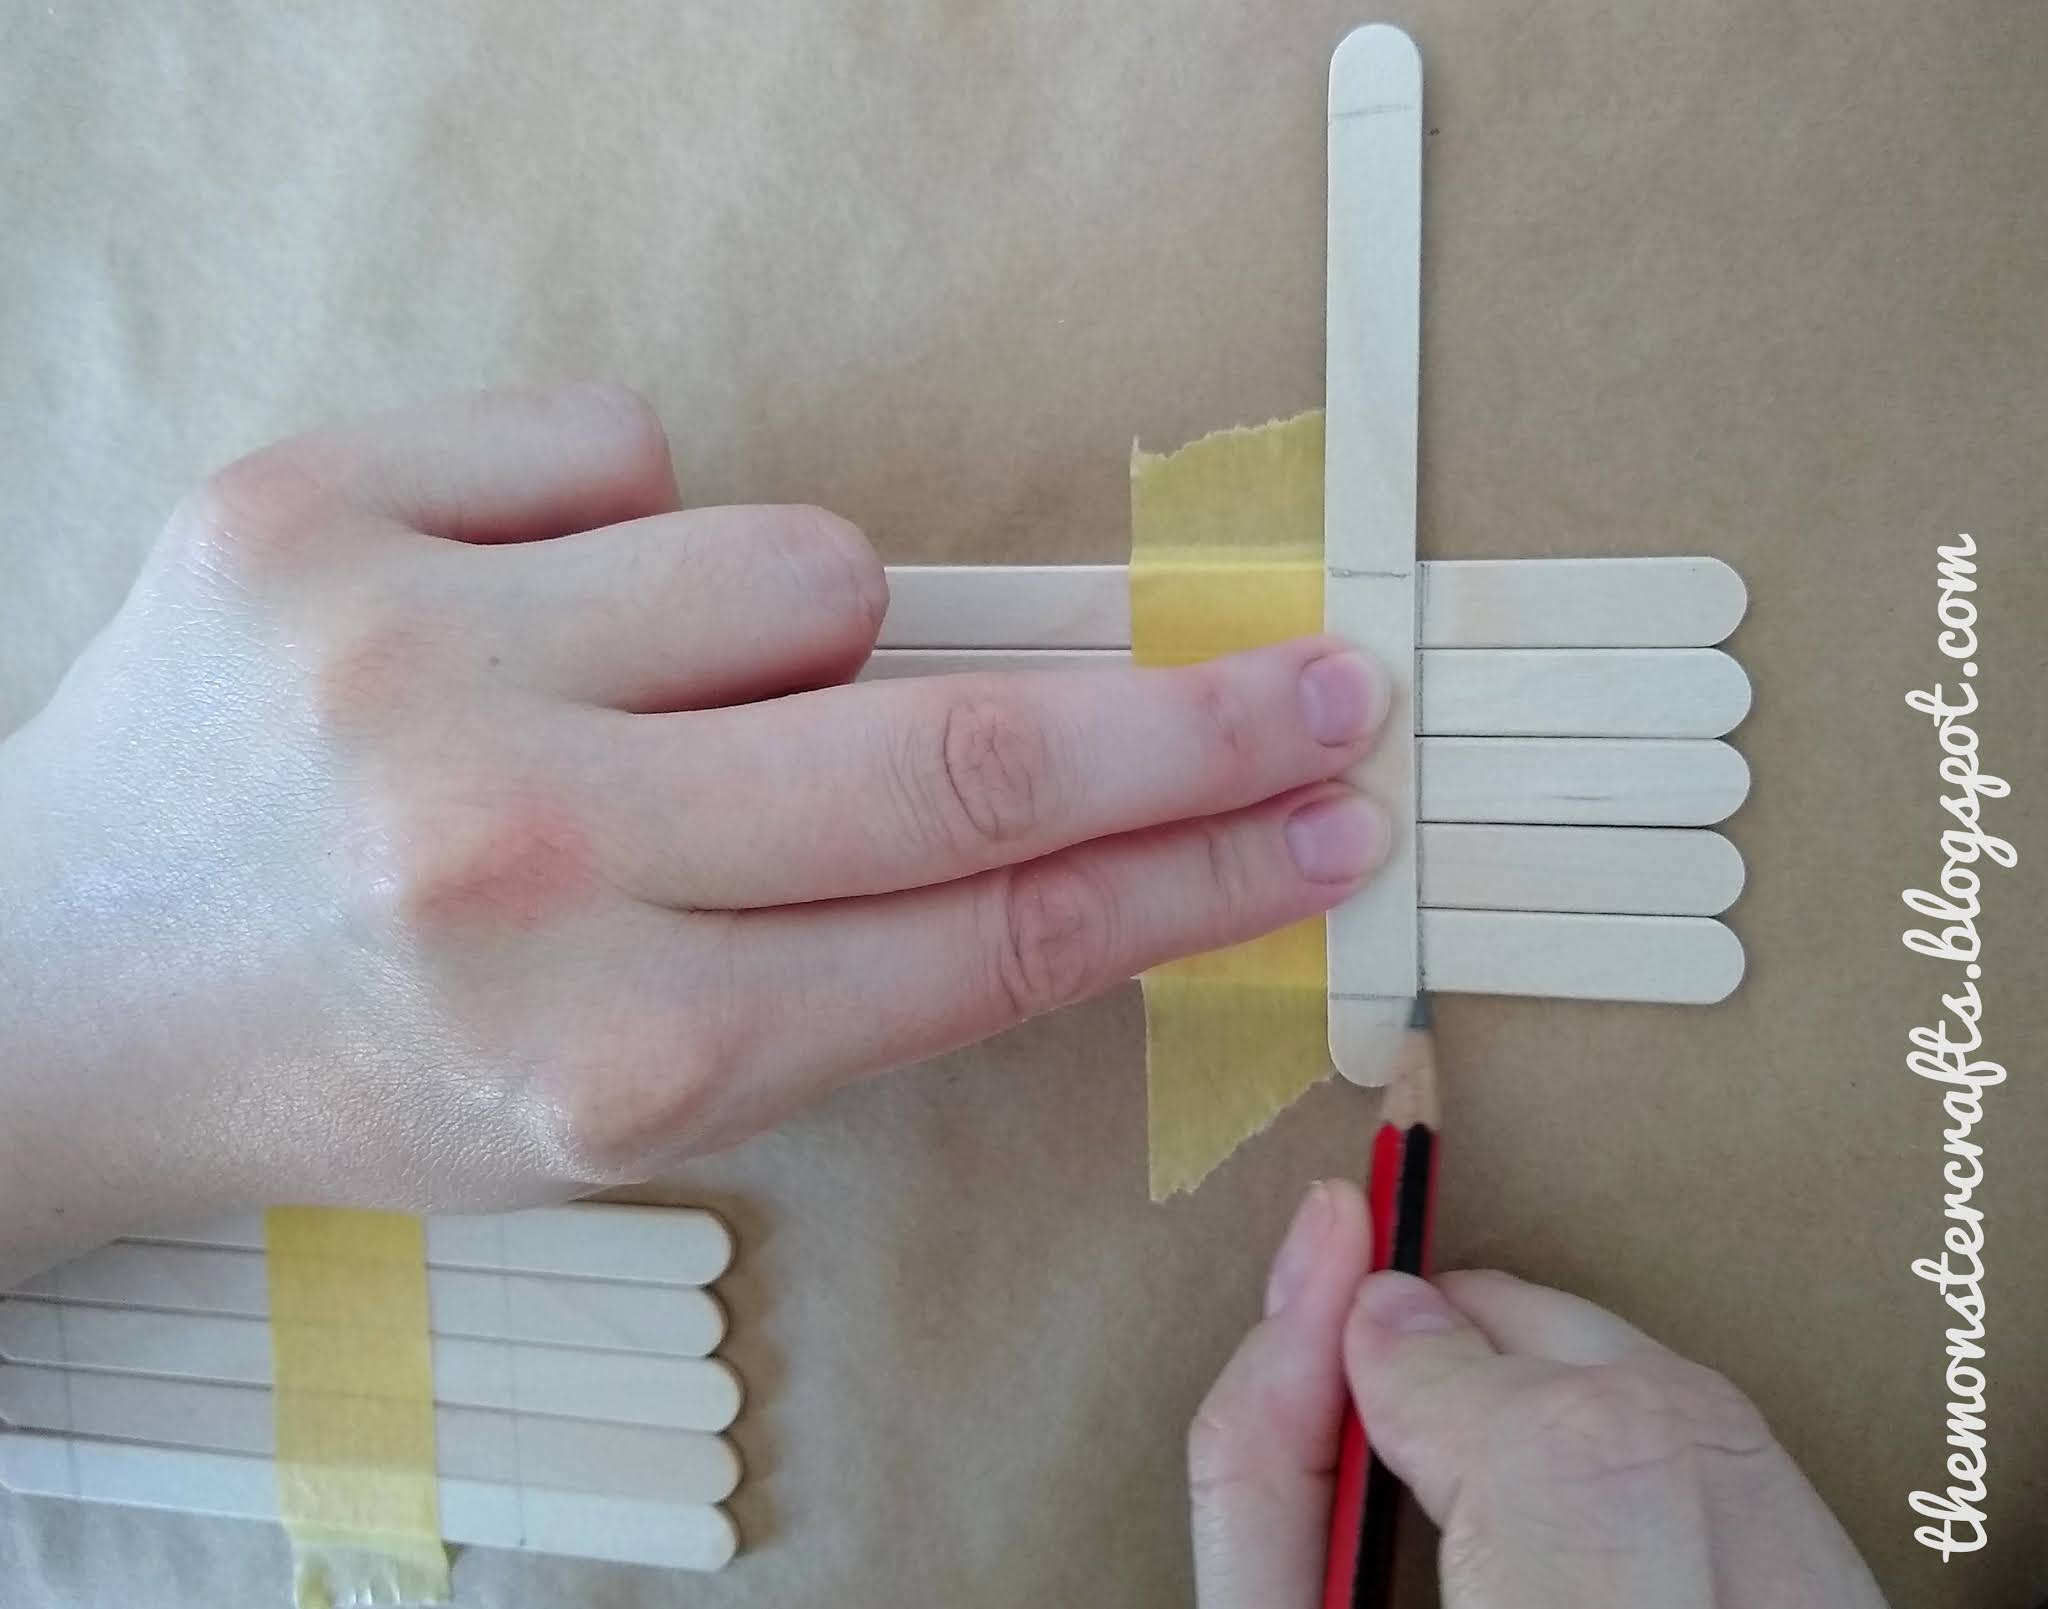
Again measure to make the sides of the box. On each side you need 4 pieces. Next, measure the two parts that intersect each other. Before I started gluing, I cut enough pieces to make two boxes because I always pour a lot of glue and don’t want to waste it.

Now it's time to glue the parts together. I always use white glue to treat wood because it dries and the cuts turn out very strong without a strong chemical odor. I brush with my oldest brush, pressing on the slice. I often weigh the pieces when they dry.

Now it's time to put the details together. I noticed that the frog at the bottom of the box took out the coins while I was still putting them. I think so because it looks cleaner, but I like the “imperfect” look of these boxes. Also, not having a lot of decor, I feel like the shelves will look full. This is a photo I took for comparison.

He glues the sides to the base, and I always glue them to the side. I think it does this so as not to add extra height to the shelves. However, I prefer to glue it to the side because I think for applying glue more space to keep it better.

Cut into pieces as desired. Set aside to dry. I like to press my fingers for a few seconds and then let it dry with something so that the side part stays in place.


Finally we have our box. Now we will make 5. I was wondering how many sticks I used for this product. I thought it might be helpful for you not to run out of stock. For the base I used 6 sticks. For 6 parts (3 on each side). For the longest side pieces I used a total of 6, 3 on each side, a total of 18 sticks in the box. Since we made 6, that means you need 108 stickers for this craft.
You can leave the boxes as is, or glue them in place. I personally want to paint it white because I don’t like its natural color. However, before deciding whether to draw it or not, I took a few photos with the dolls to help them decide.


I didn’t like the natural color, so I went and painted it. I draw the boxes before assembling the boxes as it will be very difficult after assembling the tray. However, if you like natural color, you can skip this step. This wouldn’t be a true Monster Crafts guide without a tricky image, so please enjoy one photo I took that turned out to be very mysterious.


Graduated. This is what the shelf looks like. I’ve added some accessories to make it fuller, but I don’t have a lot of jewelry or size books for the doll, so it looks a little boring. I made two orbital balls out of toilet paper according to this tutorial . The little pink rectangle was a small experiment I did when trying to make a vase with a stick. I also added an artificial plant to the greenery to create a scene.

Now it’s time to bring the dolls to see how they look on stage. For this photo I made a mini-story where Asha surprises Chloe with two tickets to a concert of her favorite band because there is no epidemic in my puppet world.


I recently made a small blue screen that I haven’t tried yet, so I think it’s a good time to see what it looks like against a doll.

I think I really need a non-flowery sofa because it diminishes the realism of the scene. Maybe I can focus on making a neutral color sofa by the end of next semester, but for now this sofa should do it.
 |
| Blake |
In general, I am very pleased with this work. I find it interesting as a background element - its height helps to distract from the fact that my walls are completely bare. I think I made the right choice by painting it white, a natural color that I wouldn’t really like. But since he is white, I now have a small dilemma. I bought a tea bag to make another shelf like on my recycling site . At first I wanted to make two, one in Sea Breeze and one in white. Since I found only one chest, I painted it white, but now I seem to have a lot of white furniture and I don’t know what color to paint. This is my best choice. What color do you like the most? You can also suggest colors you won’t find here.
 |
| Coral red, sea breeze, turquoise, gray pigeon : |
I hope you enjoyed this post. This is probably the last DIY textbook I can write for a while, as I will be back to university soon, such a post takes longer. As always, I haven’t been able to complete all the crafts and projects I planned this summer, but overall I’m very happy with what I did. Without a doubt, I have prepared enough things to improve my photo scenes. And whatever I do, it’s a project I can complete when I graduate from college in January.

Before signing today, a small public statement. The new Blogger reader seems a bit messy: I missed a few posts. I try to manually check the blogs I interact with most often every few days to see if they have a new post. I don’t know if this will work for you, but I still suggest you manually check out some of your favorite blogs. I am also considering using blog readers while waiting for Blogger to fix this mess. Any suggestions would be welcome.
See you soon in my next post.
monster character


