Upcycling: Transforming a tea box into doll furniture
hello there! Can't believe the winter is over! I felt like I was playing my last game last week and suddenly I went back to college. I'm glad I can write a few articles every month, but as usual I didn't have time to do everything or write the articles I wanted. I was busy repairing my house and tried to focus on joint projects and projects; Because I know that if I find myself in a complicated project, I will give up. I did not intend to post any "crafts", but since it is a change, I do not think it will take much time to create an empty craft.

How can I get this idea? OK, I can't take full credit. Quick Wallpaper A few weeks ago I found an Instagram post on Bonequea , where I found cheap wooden furniture and turned it into a beautiful piece of furniture. Here is his first post on IG. I really encourage you to follow her on Instagram, her photos are amazing and I admire her. When I looked at the photo, I was able to find out what he did, but more or less he explained the process in a blog post. You can see it here , but it was written in Spanish. He did not really get involved in the process. I try to explain everything step by step, because I want to explain something that is beyond my comprehension. However, let’s get started!
I put these two boxes in the pine. It is believed to be used to protect tea and other ingredients. One of the great parties does not say "graduation". I will re-create the little one today, because I still do not know what to do with the big one.

In addition, you will need other materials:

I would say it is an easy profession for adults. I do not think my readers are under 25, but since it is the Internet and you are the child who found this page, ask for help from an adult. Forgive me and my hand. I was sick for a while. Everything is fine now, but some of my fingers are slightly damaged.
I begin by removing the fasteners and bolts from the hinges. If you do not have a thin script, you can push it back with a flat window. Be careful when you try, because they may break the box. If you want to get some glass door cabinets, remove the frame.

This is what we have so far. If I want to make a glass table, the lid can be used for future products.

When done, cover the holes with a small putty. My holes are so small that I can fill them with a thick layer of primer. Allow the putty to dry for at least 1 hour.

Grind gently to remove imperfections or obstacles.

I decided to paint a dark gray. You may have seen how I used this brand before. It was produced by the Spanish manufacturer Titan in two finishes: matte and satin. I think Matt's formula is better quality and more coverage. Unfortunately, they do not create all the colors in their math formula.

I decided to do a little experimentation on the back of the cabinet to see if I needed a primer and if I could get rid of it. The wood is very porous, so it definitely needs a primer.

I decided to use Geshon as a base. It usually works well on perforated surfaces such as cardboard or even canvas. It's an inexpensive primer, and there are ways to make my own cheap content, but for me it was already at home.

Drawing between the shelves is a little difficult, but we get there. The shelves are glued and I can't take them out to paint quickly.

You allow the primer to dry properly. Complete drying of gesso usually takes 24 hours, but it may take a while if you use a different primer. Some primers (especially primers for many surfaces) give a rough surface, so I recommend dropping them lightly as they dry. If allowed to dry for a long time, the surface may be crystal clear.
Then I started drawing back and forth. Tip: Paint on a wooden line, it looks better. Of course, when you start painting shelves, it becomes a little harder to work with.

The sign is there

Provide as many layers as needed. You can paint your feet in a coat. I decided to paint them with one color, but if you want you can paint with other colors, I want to draw first and then build. It's just a personal choice, you can put the details together first and paint them if you want. I think, especially when painted in different colors, it is very simple. Once the glue has dried, it can still be touched.

Now is the time to put everything in perspective. If you can't find something that fits your feet, you can always cut the popcorn stick (as Bonica did in one room) or cut a thick wooden handle to make your foot. Of course, you can leave it at that and move on to this step.

Here is what it looks like.

Now comes the most difficult thing: you have to let it dry for a few days. I recommend drying it well for a week or more before placing it properly on the shelves, as this can leave a mark on the paint. If the baby plays with it, I suggest it dries for a while. In this case, giving a roof or varnish may be a good idea. Once completely dry, your toys can be enjoyed.

This craft did not take long. It took me a lot of time because I was so busy these days, but it only takes a few days if you focus on that (consider the time it takes to dry the paint and glue). I would say it is a very cheap project. I had everything I needed except boxes, blocks, and fillers.

If you can't find such a cut box in it, you can always buy the standard one and shave it with plaster. It will take you a little longer, but it will allow you to paint a different color on the back of the books.

I have prepared a quick diary with the cards, wallpaper and sofas that come with the IKEA Huset collection.

Here are some of the ones I found to be interesting:

I hope you enjoyed this article and it will give you some ideas for your doll house. If you have developed your own version, let me know by leaving a comment on any message. Or email me on Instagram or other social networks. I want to see your creation.
College starts in a few days and I don't know if I will have time to write a post at the beginning of the school year, so this may be the last post in a few months. I will try to write another article, but I can not make any promises. The school year always starts well, but at the end of October my life was a train wreck.

I also did not know if you had noticed the difference between my epidemics, but Mr. Monster surprised me with a ring light a few weeks ago. I did not plan to light the food until we got home, but I was surprised to find so much. I’m still thinking about how to set it up to make it work for me, but we’ll finally get there.
I wish you a good and wonderful fall. Look good!
CM
Social Networks
FacebookTwitterInstagramTumblr _ _ _

How can I get this idea? OK, I can't take full credit. Quick Wallpaper A few weeks ago I found an Instagram post on Bonequea , where I found cheap wooden furniture and turned it into a beautiful piece of furniture. Here is his first post on IG. I really encourage you to follow her on Instagram, her photos are amazing and I admire her. When I looked at the photo, I was able to find out what he did, but more or less he explained the process in a blog post. You can see it here , but it was written in Spanish. He did not really get involved in the process. I try to explain everything step by step, because I want to explain something that is beyond my comprehension. However, let’s get started!
I put these two boxes in the pine. It is believed to be used to protect tea and other ingredients. One of the great parties does not say "graduation". I will re-create the little one today, because I still do not know what to do with the big one.

In addition, you will need other materials:
- Putty for wood or universal putty.
- Screwdriver to remove bolts.
- Crafts, acrylic or pencil drawing. You can also use tinctures.
- Brush or roller.
- For sand or gravel paper, sand putty.
- Wood flooring or primer for many floors. This can be an option depending on the wood or color you choose.
- White glue (optional)
- Beads or small wooden poles made for needlework (for shelf legs, as an alternative).

I would say it is an easy profession for adults. I do not think my readers are under 25, but since it is the Internet and you are the child who found this page, ask for help from an adult. Forgive me and my hand. I was sick for a while. Everything is fine now, but some of my fingers are slightly damaged.
I begin by removing the fasteners and bolts from the hinges. If you do not have a thin script, you can push it back with a flat window. Be careful when you try, because they may break the box. If you want to get some glass door cabinets, remove the frame.

This is what we have so far. If I want to make a glass table, the lid can be used for future products.

When done, cover the holes with a small putty. My holes are so small that I can fill them with a thick layer of primer. Allow the putty to dry for at least 1 hour.
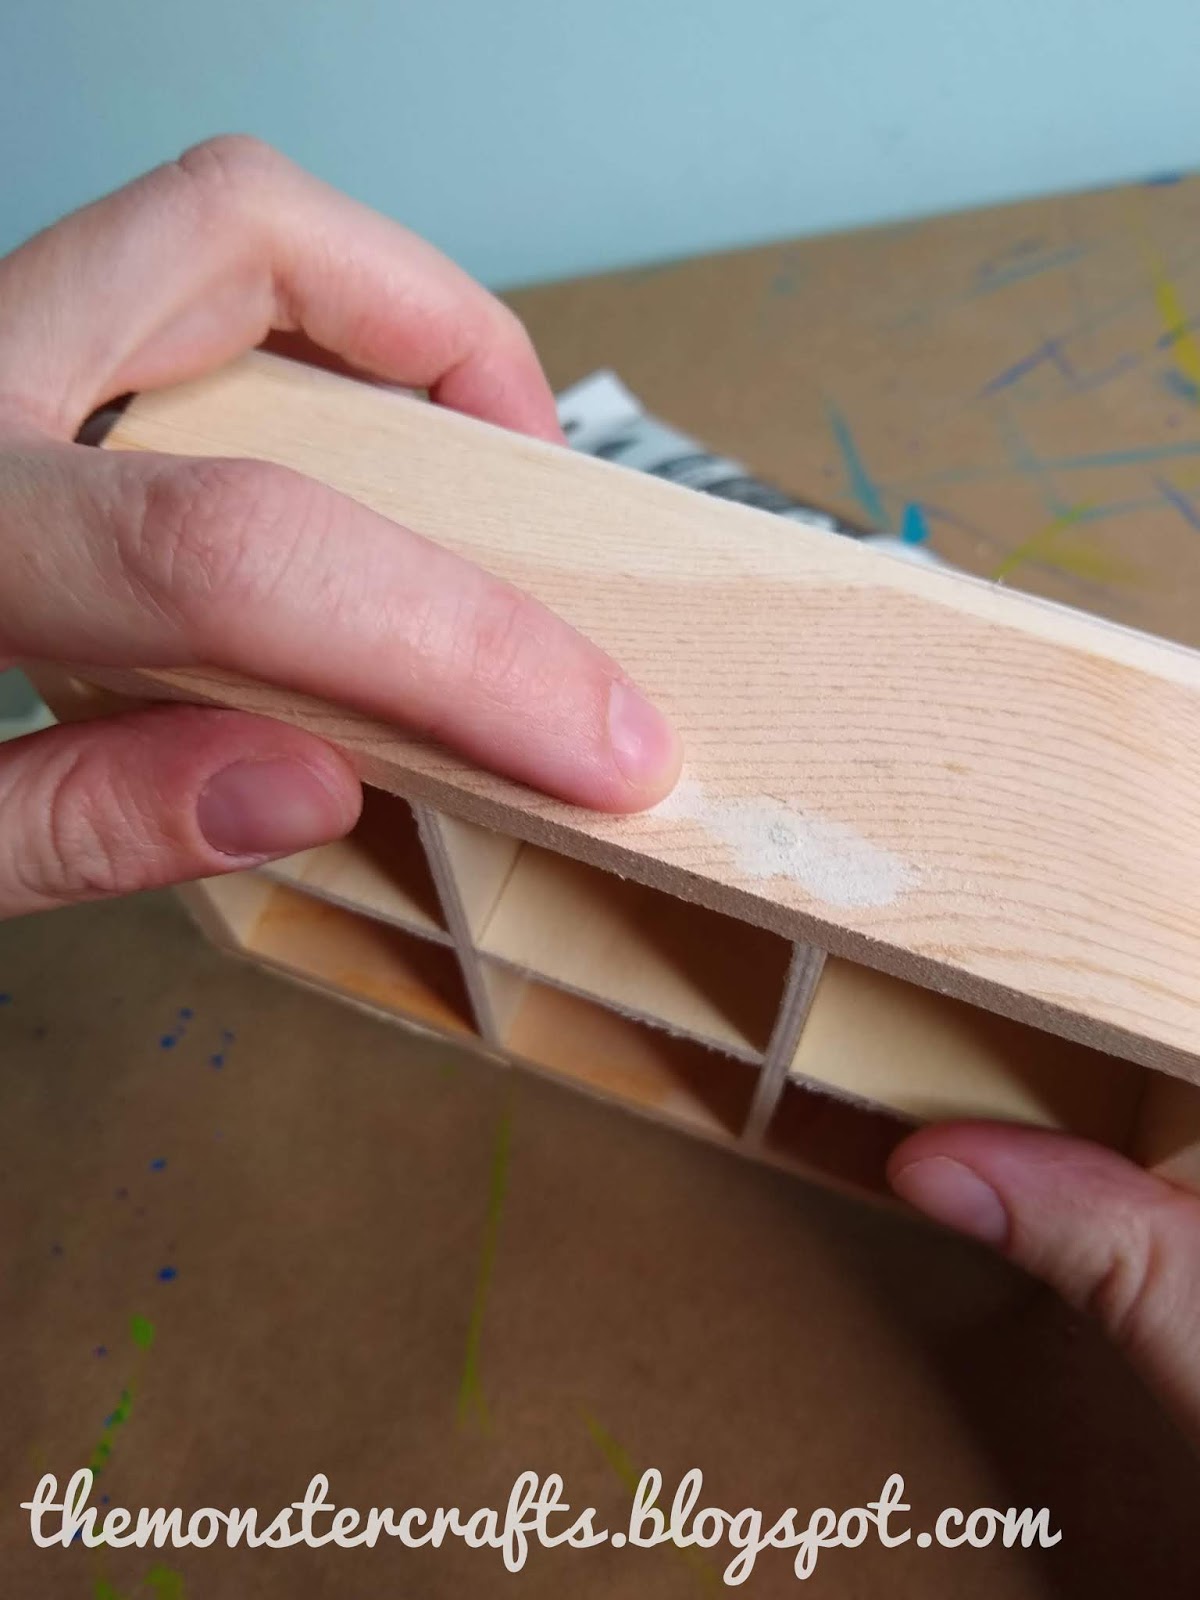
Grind gently to remove imperfections or obstacles.

I decided to paint a dark gray. You may have seen how I used this brand before. It was produced by the Spanish manufacturer Titan in two finishes: matte and satin. I think Matt's formula is better quality and more coverage. Unfortunately, they do not create all the colors in their math formula.

I decided to do a little experimentation on the back of the cabinet to see if I needed a primer and if I could get rid of it. The wood is very porous, so it definitely needs a primer.

I decided to use Geshon as a base. It usually works well on perforated surfaces such as cardboard or even canvas. It's an inexpensive primer, and there are ways to make my own cheap content, but for me it was already at home.

Drawing between the shelves is a little difficult, but we get there. The shelves are glued and I can't take them out to paint quickly.

You allow the primer to dry properly. Complete drying of gesso usually takes 24 hours, but it may take a while if you use a different primer. Some primers (especially primers for many surfaces) give a rough surface, so I recommend dropping them lightly as they dry. If allowed to dry for a long time, the surface may be crystal clear.
Then I started drawing back and forth. Tip: Paint on a wooden line, it looks better. Of course, when you start painting shelves, it becomes a little harder to work with.

The sign is there

Provide as many layers as needed. You can paint your feet in a coat. I decided to paint them with one color, but if you want you can paint with other colors, I want to draw first and then build. It's just a personal choice, you can put the details together first and paint them if you want. I think, especially when painted in different colors, it is very simple. Once the glue has dried, it can still be touched.

Now is the time to put everything in perspective. If you can't find something that fits your feet, you can always cut the popcorn stick (as Bonica did in one room) or cut a thick wooden handle to make your foot. Of course, you can leave it at that and move on to this step.

Here is what it looks like.

Now comes the most difficult thing: you have to let it dry for a few days. I recommend drying it well for a week or more before placing it properly on the shelves, as this can leave a mark on the paint. If the baby plays with it, I suggest it dries for a while. In this case, giving a roof or varnish may be a good idea. Once completely dry, your toys can be enjoyed.

This craft did not take long. It took me a lot of time because I was so busy these days, but it only takes a few days if you focus on that (consider the time it takes to dry the paint and glue). I would say it is a very cheap project. I had everything I needed except boxes, blocks, and fillers.

If you can't find such a cut box in it, you can always buy the standard one and shave it with plaster. It will take you a little longer, but it will allow you to paint a different color on the back of the books.

I have prepared a quick diary with the cards, wallpaper and sofas that come with the IKEA Huset collection.

Here are some of the ones I found to be interesting:

I hope you enjoyed this article and it will give you some ideas for your doll house. If you have developed your own version, let me know by leaving a comment on any message. Or email me on Instagram or other social networks. I want to see your creation.
College starts in a few days and I don't know if I will have time to write a post at the beginning of the school year, so this may be the last post in a few months. I will try to write another article, but I can not make any promises. The school year always starts well, but at the end of October my life was a train wreck.

I also did not know if you had noticed the difference between my epidemics, but Mr. Monster surprised me with a ring light a few weeks ago. I did not plan to light the food until we got home, but I was surprised to find so much. I’m still thinking about how to set it up to make it work for me, but we’ll finally get there.
I wish you a good and wonderful fall. Look good!
CM
Social Networks
FacebookTwitterInstagramTumblr _ _ _


