How to: Doll-size crate console. An experiment
If you've been following this blog for a long time, you probably know that I'm currently creating walls and accessories for my pop photos. My plan is to have a range of accessories that I can mix and add variety to my photos; Instead, I need to create a large diorama with a single theme that won't fit. Some of them are based on someone else's ideas, and others are based on my ideas.

When I make mydoll-sized bookshelf , I start thinking about other types of furniture that can be made into boxes, but it didn't take long. So, I came up with ideas, and to see them flush it out, it's really fun. Not sure if the console is the right name for this type of furniture. As far as I understand, "quilt" can be the kind of furniture that is often found in hallways, where you can leave the keys when you go home.
Since I didn't have a visual reference for this craft, the end result was pretty hard to imagine. I've made a few mistakes, but fortunately nothing can be fixed if I create a second version of this craft. Due to the Flash restrictions, I couldn't get everything I needed for the craft, so I had to work from home with what I had. So, with any further expansion, let's get started.
For this craft you need:
- Glue sticks.
- Glue. I always use PVA glue, but hot glue also works.
- Wooden pen
- Glue stick scissors.
- A small saw for cutting wooden poles.
- Handmade paint.
- Brush.
I made some notes on how to make pop sized boxes, but for this project I decided to try a new box design. However, if you decide to recreate this design, you can do so with the original box design.
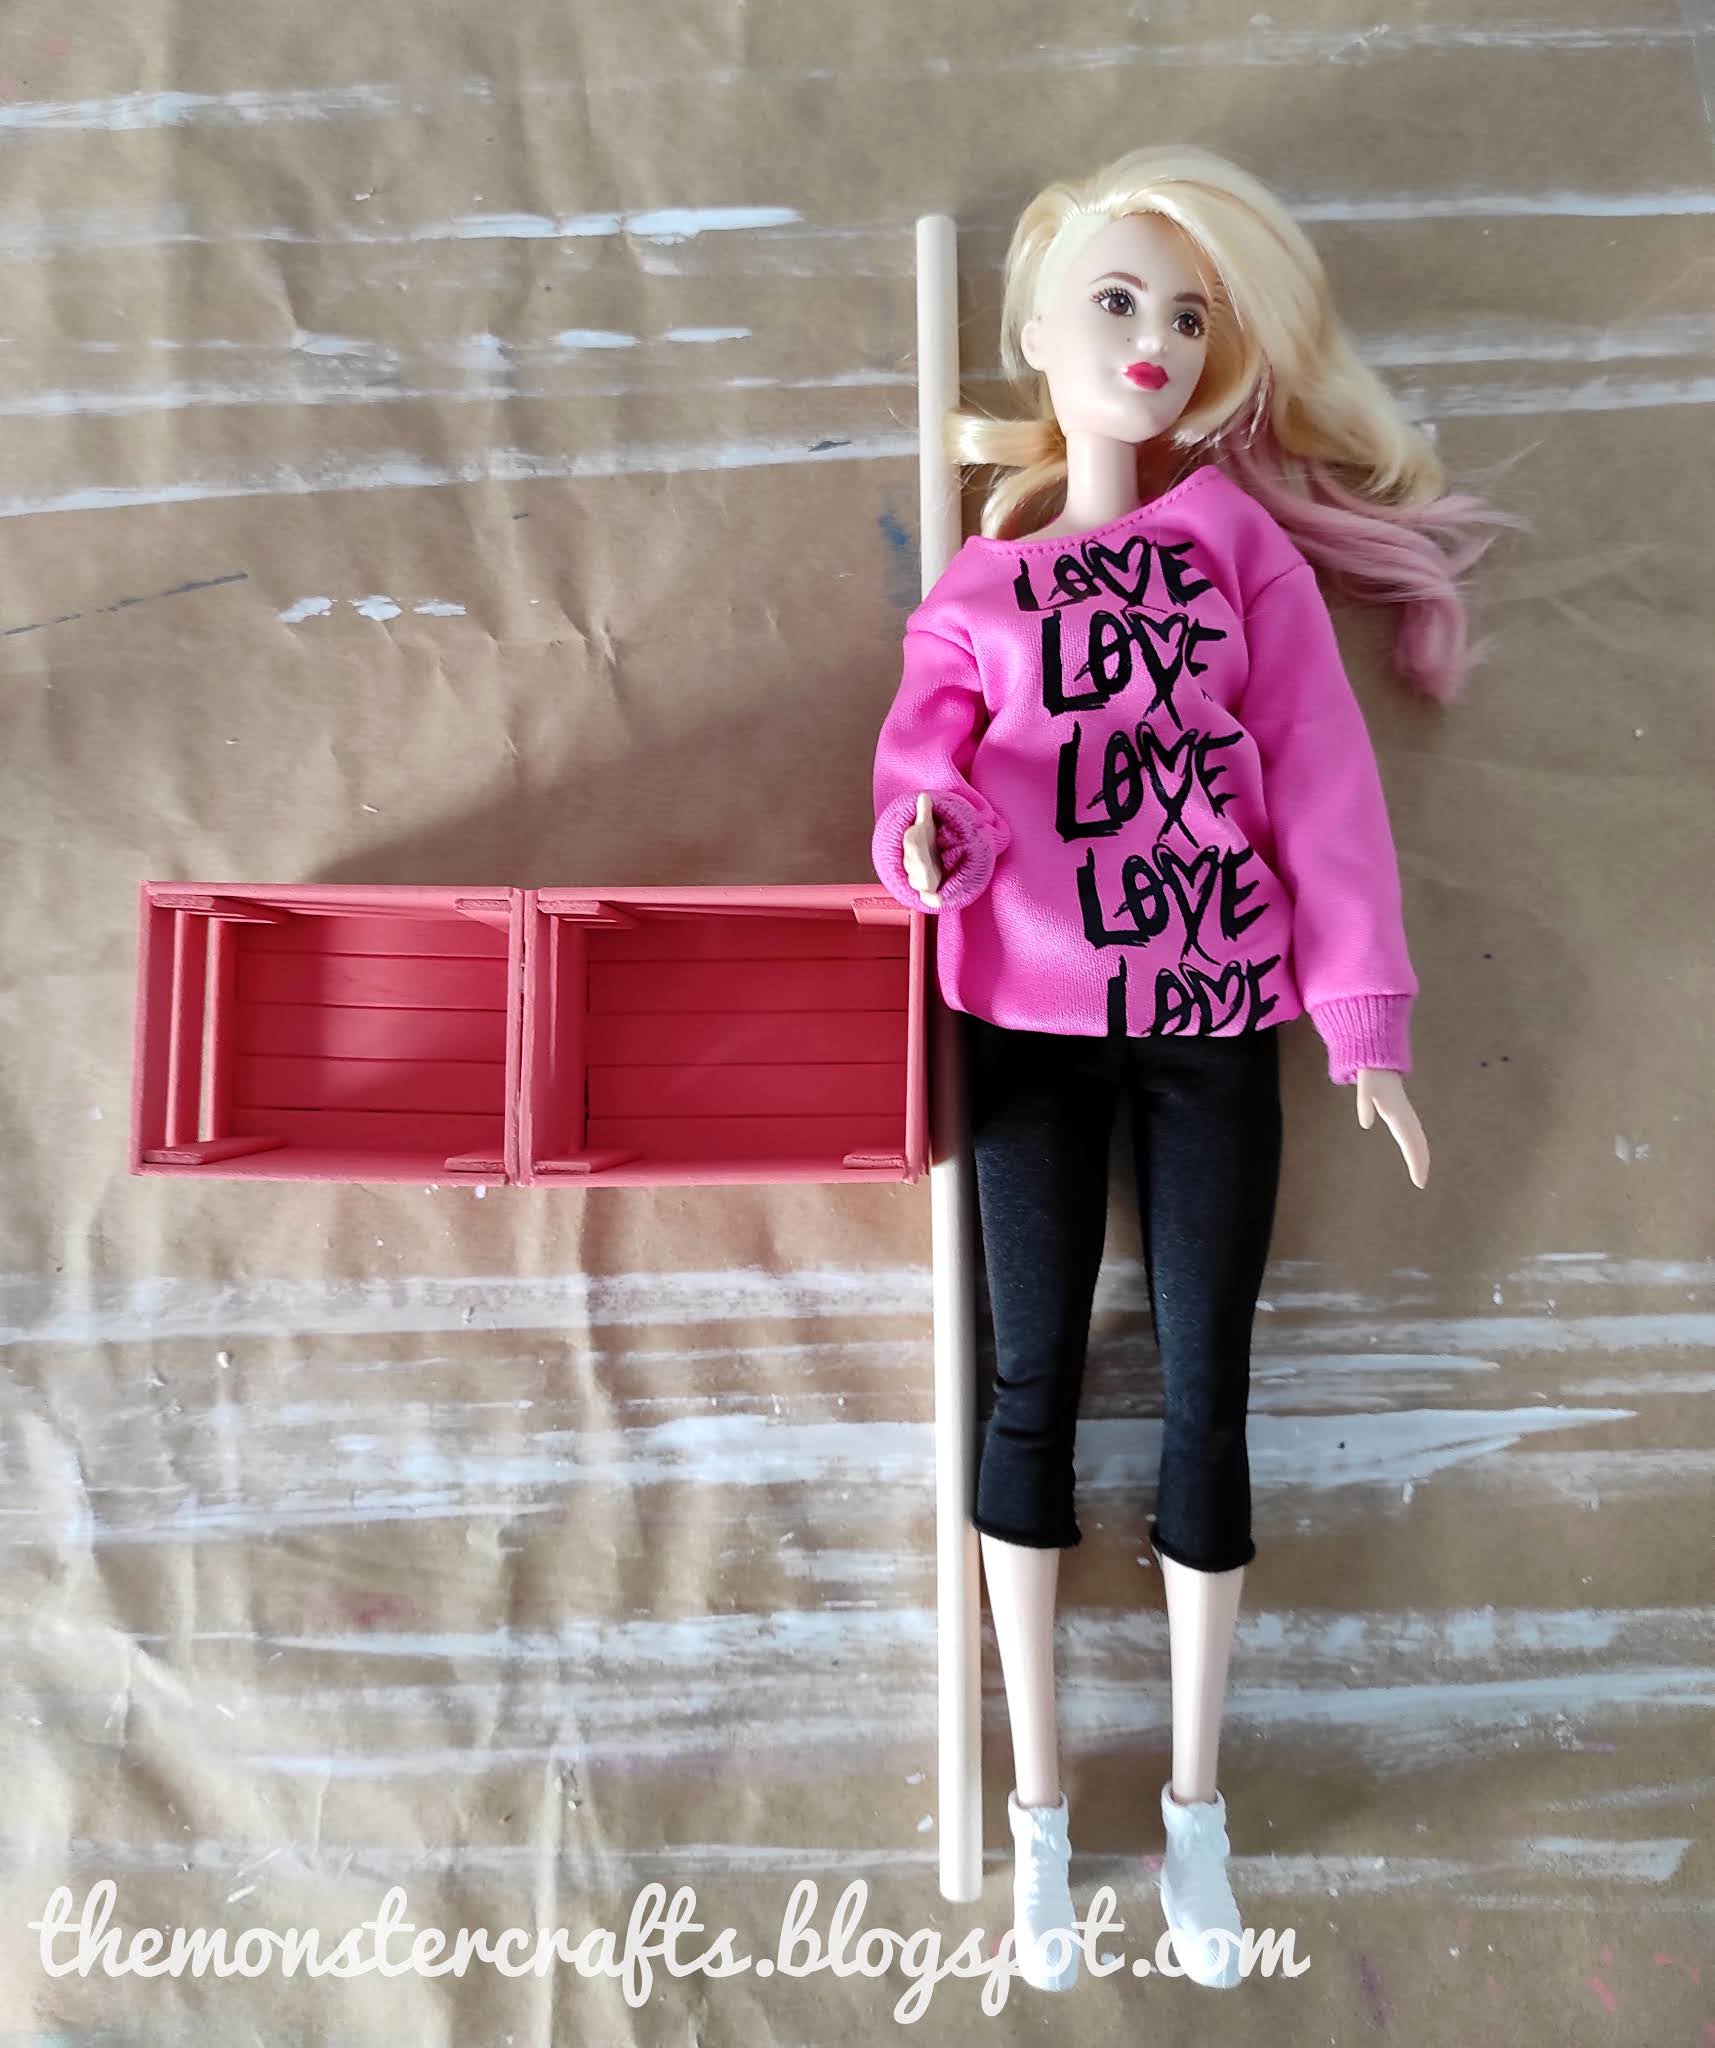
To determine the exact size for this craft, I drew two 6 cm wide rectangles on paper for visual comparison next to my doll. Here is a comparison of my color box.

I start by aligning 5 sticks 6 cm (2.36 inches) apart as usual.

Cut them along the drawn lines. To do this, I use garden scissors, which greatly simplifies the pruning process.

Attach all the cut sticks. Measure the stick you are crossing. I make it a little smaller than the width of the stick. This will happen on our panel, so we don't want the sticks to come out from above.

Stick them on the other side. I glued a little to their edges. If you have any imperfections on your part, sand the edges.

Measure the wood to the width of the longest part - cut it out.

You will need to cut 4 for one side of the box.

Measure, cut in two to pass, as we did. This time we will glue them to the ends. You need to make these two pieces for each side.

Now is the time to take it. Take the first piece we made և, place it on top of the right side (so the pieces that go through should be at the bottom). Then stick one side with the bare side out.


Repeat with the other part. This is what you should have.

Now it's time to "connect" the two sides. Let's start by measuring the gray bar, whose width is equal to the width of the hole.

Cut and paste these. Remember to start at the top and leave in the middle for the end. Also remember that you have to do it on both sides.

Finally our box is ready. Here is a comparison with a normal horse so you can easily see the difference.

Make two boxes. You can work on both at the same time, or create one from the other as you wish.

Now it's time for my favorite part: drawing. I chose Americana Acrylics Coral Blush because I wanted to brighten the background.

I like to draw the pieces together before I glue them and touch them when needed.

Once the paint is dry, it's time to apply. Try to keep them hidden so that they hide all your faults.

Now, here's where it all started. Because I was busy with other things, I stopped this project for a few days and didn't have time to finish it. Over the weekend I was planning to finish it, I woke up with a 4 day permanent migraine. The first day I felt better, I decided to work on it more: maybe I didn't make the best choice. But let's go.
Now it's your turn. In my original idea, I wanted to use square legs, but I couldn't find square wooden poles or craft sticks anywhere. When I started the project, the situation here was quite worrying, the restrictions were more stringent, so I decided to use everything in the house, such as round wooden plunger. I decided to go with the slim one.

If I had the doll as a guide, I thought 12 cm (4.72 inches) would be perfect. Loot, I'll find out later that they're too long.
Now is the time to cut them. I decided that what I really needed to do was learn how to do it right. To see them, fasten them with a screw clamp or help someone Personally, it would be easier for me if Mr. Monster kept it away from me instead of insisting.

If there is a mistake while cutting, rub it with sand.

Here's what we have. You have to do 4.

Now it's time to sign up. It was an experimental bit because I never painted wood with acrylic. I have tried two strategies. First, I mixed some brown acrylic with a clean shell (like medium clean acrylic). Second, I diluted it with brown acrylic water. I saved the rest of the sticky sticks to try to draw a picture first and choose the most suitable technique. I choose acrylic diluted with water.

As you can see in the photo below, the brown I chose has a cool purple hue. That's what my coat-wearing tax evaders thought.

Since I didn't think this color would work with boxes, I tried to warm it up. I mixed water with another brown, dark americana chocolate , luckily it was a warm undertone. I had to give my dad two coats of warm brown until I got a color I was happy with. Despite the initial mistakes, I am very happy with the end result. If that didn't work, my plan was to paint them light brown.

Remember when I said I'm sorry to stretch my legs so much? I did a test next to my doll before I stuck it, I didn't like what it looked like. I finished by cutting 1 cm from each mason and keeping each foot 11 cm ( 4.33 inches). So yes, if you do, make sure your feet are the right size from the start.
Now is the time to glue our feet together. Before I start I measure where I want my feet to be because I can’t ignore it.

Wait for the glue to dry. Rotate the texture. I put too much glue on one of my legs, it accidentally closed, it didn't fit perfectly in front of me.

Now it’s time to take a look around and see what it looks like. I won't lie, I thought it was terrible. The proportions are not so accurate, it is clear that the legs are too long. I also think it would look even stronger if I could find the square deviations. I was very disappointed with this.
 |
| Pilot shooting |
However, although I did not like it, I decided to try it. To my delight, not as bad as I thought.

The proportions are still not as good, the color isn't as bright as I expected, but it's not a bad start. Note that this is only for the background of the photo, not the focus.

Overall, I'm very happy with this project, but it has some flaws. I'd like to do this again, but try to improve it with a few modifications (short legs for example). Now that things have calmed down, I might go out and get some square wooden poles. I also like to do other crafts - small pieces of furniture that do not include sticks. I like to make them because it's easy enough for most people to find and work on, but I also want to try new things.
In my next post I want to talk about the upcoming Monster High Reload. I know I'm late for the party, but instead of rushing, I really want to write a thoughtful post just to break the news. I don't know what to write after that, I got a little 'lost'.

In other news, I completed an HTML course last week. It has a second part that is deeper, but I decided to take a break this week to work on the content of my blog. On top of that, Mr. Monster is still working from home. He was supposed to stay home for only a month until mid-February, but his company decided that they should stay home until mid-April. I like her because she befriends me when I make her, she likes me because she can wake up later.
So what do you think? Are you preparing something similar? Do you want to see more "furniture" or are you tired of it?
Hope you are well - see you in the next post.
Crafts with samples
For other crafts, see the Doll Craft label .


