Halloween Mugs with the Cricut Mug Press

Halloween Mugs with Cricut Mug Press
One month to Halloween! I love the change of the seasons... from the hot summer to the closing, cool breeze and fall of autumn leaves. I love the smell in the air, it smells like Halloween!
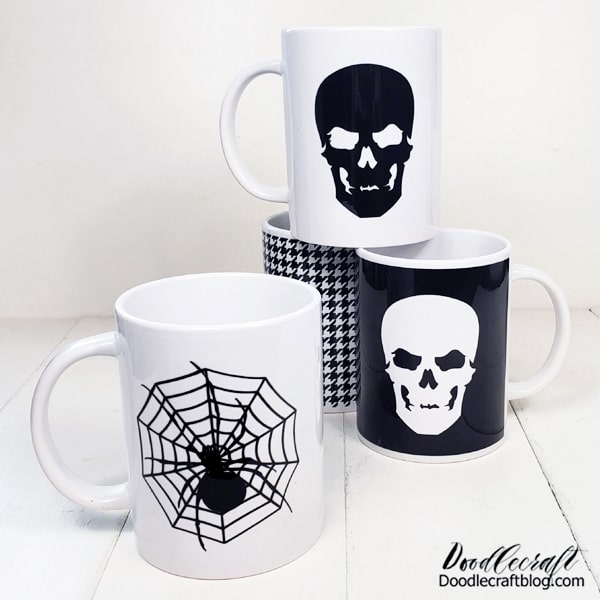
By the way, I also love mugs, so the Halloween mugs were the perfect addition to a hot chocolate bar. Let me show you how easy it is to make mugs with Cricut Infusible Ink Transfer and a Cricut Mug Press . I received these products from Cricut in exchange for this post.

Mugs make a great handmade gift! If you're thinking of handmade gifts for the holidays, this is a great option! These mugs are dishwasher and microwave safe! Boom, a passing gift.
The initial investment is a Cricut mug press ... but it's awesome. I have been making mugs for a year but this tool makes things so cute and saves so much time.
either

Necessary accessories for the Halloween mug:
Cricut Maker (or equivalent machine)
cotton ball
Step 1 - Cut the Infusible Ink
First select a design from the Cricut Design Space. I chose a skull and a spider web. I love that the skull took on a shape that I could use for a second mug.
Create a canvas by selecting a square shape, placing it on the canvas, and then turning off the lock icon so it can be resized separately. Make it 8.75 inches wide and 4 inches tall.
Then add the skull image to each side of the rectangle, crop the images together and you're ready to cut.
image mirror Place the infusible ink on a sturdy mat and use the heather to roll it into place. touch it as little as possible.
Then select the material and cut it.

Step 2: Remove the infusible ink
With dry hands, gently remove excess infusible ink from the liner. Touch the ink side of the transfer as LIGHTLY as possible or the ink will rub off. Peel off like a sticker.
Carefully remove the positive molds and you can use them as a second cup.

Step 3: Stick to the cup
Now use a lint roller to remove any dust or microorganisms from the cup. Wrap the transfer film around the mug and secure with heat tape.
** HELPFUL TIPS **
The thermal tape dispenser is very practical!

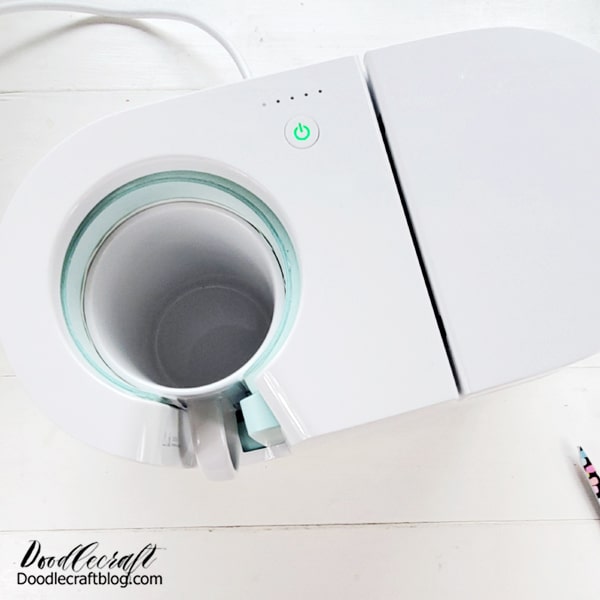
Step 4 – Heated Mug Press
Attach the Cricut Mug Press. If you are doing this for the first time, you must be connected to a computer and up to date before you begin. Then turn it on and let it heat up. The indicator turns green when it is ready to be pressed.

Step 5: Click on the mug
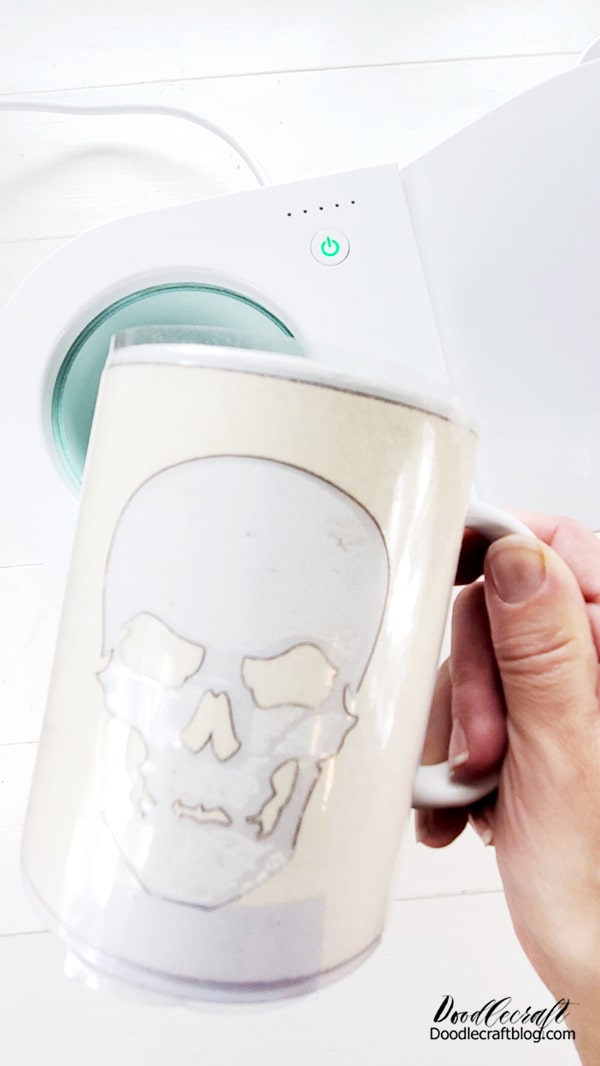
Then lift the top flap and insert the cup into the hole. Then tighten the valve and let it sit. The mug press goes through a series of 5 small lights at the top, which takes about 5 minutes. Then it rings.
Unhook the cup and carefully remove it by pulling on the handle... the rest is SUPER HOT!
So the hard part is letting the mug cool completely.
Once the mug has returned to room temperature, remove the tape and transfer. Watch the magic unfold!
Work on other mugs while you wait for them to cool down, it helps.

And here it is! Isn't it fantastic? Infusible ink becomes bright, vivid and full of life! It is infused with ceramic and cannot be scratched, chipped or chipped.
The perfect handmade gift for teachers, neighbors, friends, and family! I love giving matching mugs as party favors!

The best part is how long it lasts. If you decide on your image quickly, it can take 10 minutes or less to get rid of a few cups.
Create matching cups for any party, pencil holder, makeup brush holder, or seasonal decoration!

That's it! Requests? Feel free to ask me anything Cricut related at maildoodlecraft@gmail.com.
Please like, pin and share!


