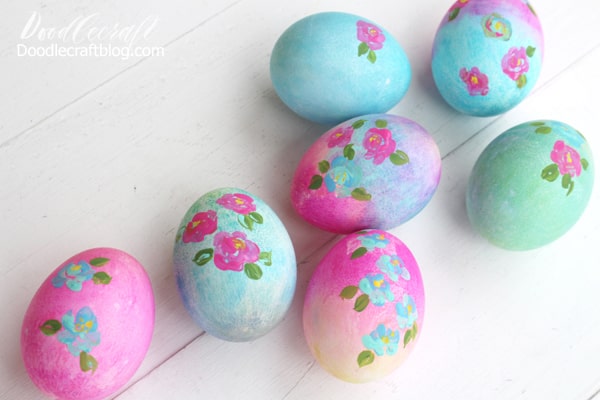
Floral Painted Easter Eggs Dyed with Tombow Markers

Easter eggs are painted with flowers!
Egg painting has never been my favorite art. As a child I loved to draw and die... but now I'm a little crazy! Even a simple project: die an egg and just add color to make the flowers grow.

Surprisingly and beautifully on the Easter dinner table...absolutely brilliant pastel colors.
Step 1 Boil the eggs
Cook your eggs according to the Hamilton Beach Egg Cook label. It only takes about 18 minutes for the eggs to hatch properly. There is no brown/blue around the yellow, perfect every time!

Necessary materials for painting Easter eggs with flowers.
Step 2: Color the boiled eggs

Start drawing with a marker directly on the plastic bag.

It will be weak, but don't worry.

Then spray the plastic bag with a spray bottle.

Place the egg in the center of the bag.

Wrap the bag around the egg and watch the colors mix and blend.

Open the bag to see the vibrancy of the colors!

Gently remove excess paint with a paper towel.

Repeat with all shades and colors. Let them dry completely.

Step 3: Draw flowers on the egg.
Now take some handmade acrylic paint and a small round brush.

Don't be afraid of these colors... they take a few seconds and they are so stupid!

Hold the egg with your bare hand.

Use a small brush to add some round dots.

Then add a U-shaped ball around the center.

Again add a few more shapes around the leaves.

Add some yellow dots in the middle.

Add more leaves and flowers!

Watch this video on volumetric colors - it will help you feel more confident in doing your own things.
That's all!
These aubergines are a lighter color because I want them to show the color of the marker a bit...they look more watery.

Like and Share!


