DIY Resin Monogram Necklace with Vinyl
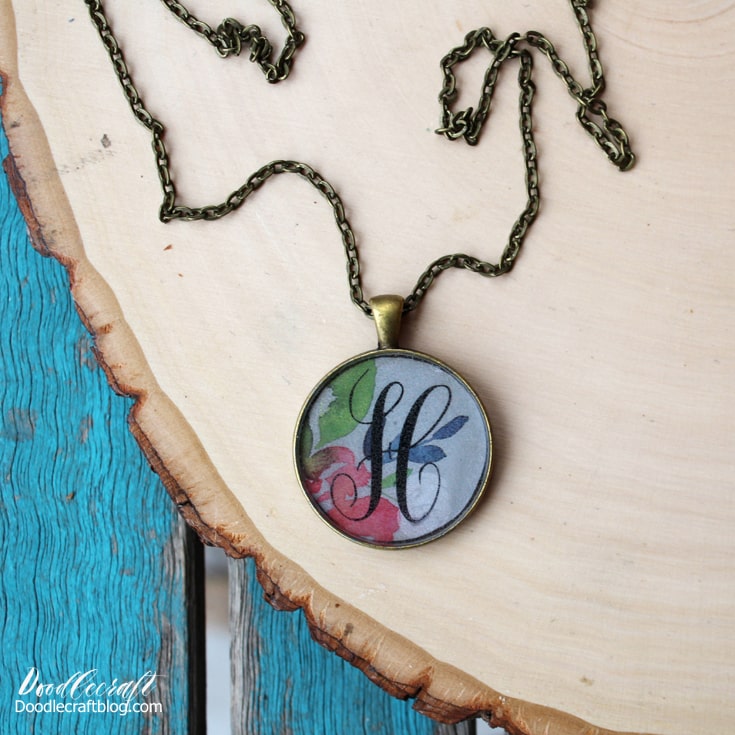
DIY Resin Monogram Pendant with Vinyl
Create your favorite monogram necklace in minutes. The perfect handmade gift for the person you love. This necklace is easy to make and a great project if you are new to resin. Jewelry resin is addicting - you will love it!
If you haven't finished your resin work yet, this is the perfect project to get you started. The resin consists of two parts that undergo a chemical reaction when mixed to harden. Polishes, smoothes and hardens like pure glass.
The resin can yellow over time, so it's best used on darker or at least non-white surfaces. All resins will yellow over time, which is not brand specific. Just a warning if you're working with it. Provides a beautiful bright finish!

I chose "H" for my daughter, what letter would you choose?
Find a font with the font style you want. I like the excellent font, you can write it yourself with a permanent marker or cut it out of vinyl with an electronic vinyl cutter.
Accessories for Resin Monogram Necklace:

Step 1: Cricut Vinyl
Using scissors or an ax, cut a piece of paper to the inside size of the ring.
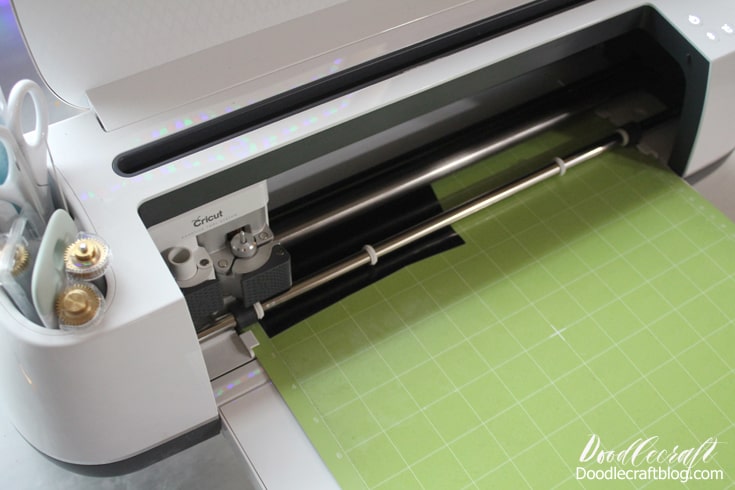
Then use the Cricut Maker to cut the vinyl to about 3/4 inch the size of your hanging frame.
Then place the transfer tape on the vinyl and transfer the monogram onto the album paper.

Step 2: Mod Podge
Then paint the Mod Podge color inside the ring.

Insert the album paper and then paint Mod Podge on the paper. Let it dry completely.

Step 3: Hair Accessories
Now read the instructions for jewelry resin. It is very important that you familiarize yourself with the instructions before mixing the resin. It's time sensitive and if it's not mixed well it won't settle and your project will be ruined.
Well, then read the instructions.
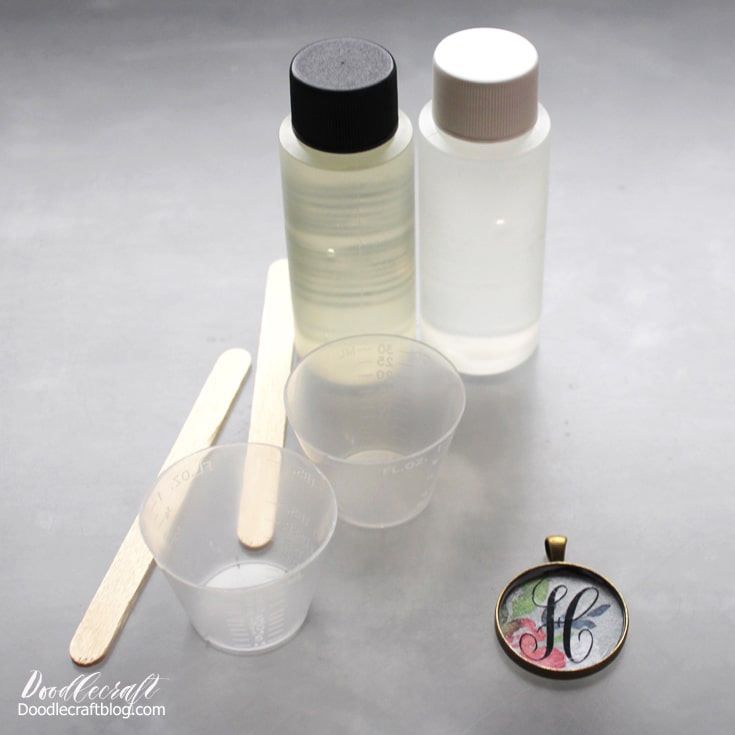
This ring doesn't require a lot of resin, but mix 1 part resin with 1 part hardener and mix for 2 minutes. Transfer to another cup and mix with the second stick for another minute. The mixing of this two step process is very important for the curing of the resin.
Stir slowly to avoid splashing.

Place the telescope on an elevated surface, and then fill the inside of the telescope with a resin mixture. Leave on for 5-10 minutes, then use a torch or heat gun to blast any blisters that form. Sit and tighten overnight.

Step 4: Add a channel
Use pliers to attach the chain to the loop.
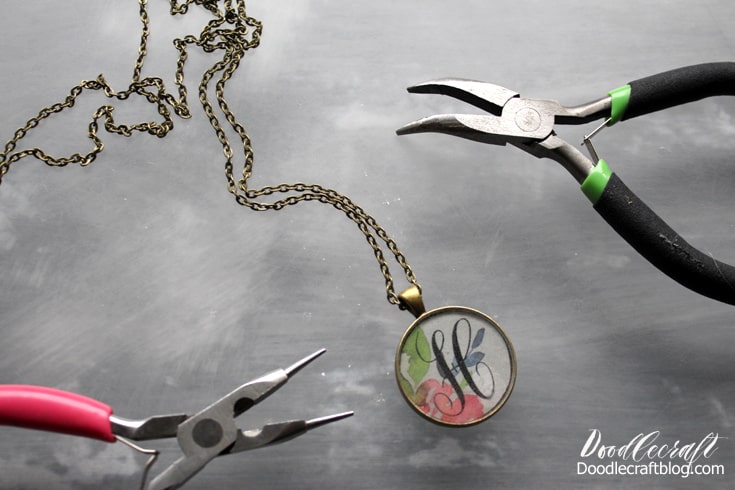
That is! This necklace is ready to wear or to display!
I don't wear a lot of jewelry, but I love necklaces. I also love the big chunks and all the glitter and pretty crafts!
This first necklace is easy to make and just needs a little drying time... but it makes a beautiful handmade gift.

Gorgeous and easy! This is an elegant necklace that will mean a lot to whoever made it. Perfect for an Easter surprise or a Mother's Day basket!

That is! Enjoy this personalized monogram necklace. Handmade is perfect to try as a gift, Easter accessory or just as resin. You will love it!
Like, bookmark and share!

Check out this fun resin creation too!


