How to Make Sublimation Mugs with Child's Art
How to make ecstasy cups with kids crafts!
Transform your child's precious creations into the perfect Kipsack cup! A great way to turn a chalkboard stuck in the fridge into a useful treasure. These whimsical mugs also make a wonderful handmade gift. Buy a great printer and make these fun mugs for Easter gifts, teacher compliments, Mother's Day, Father's Day, birthdays and more!
Surely you have several works of art that will become immortal in a mug!
The best part. This mug is dishwasher and microwave safe. Ouch!

This is the biggest project, I love it! Maybe I like it because I made these mugs for my kids for Christmas. But actually, I think I made them myself.
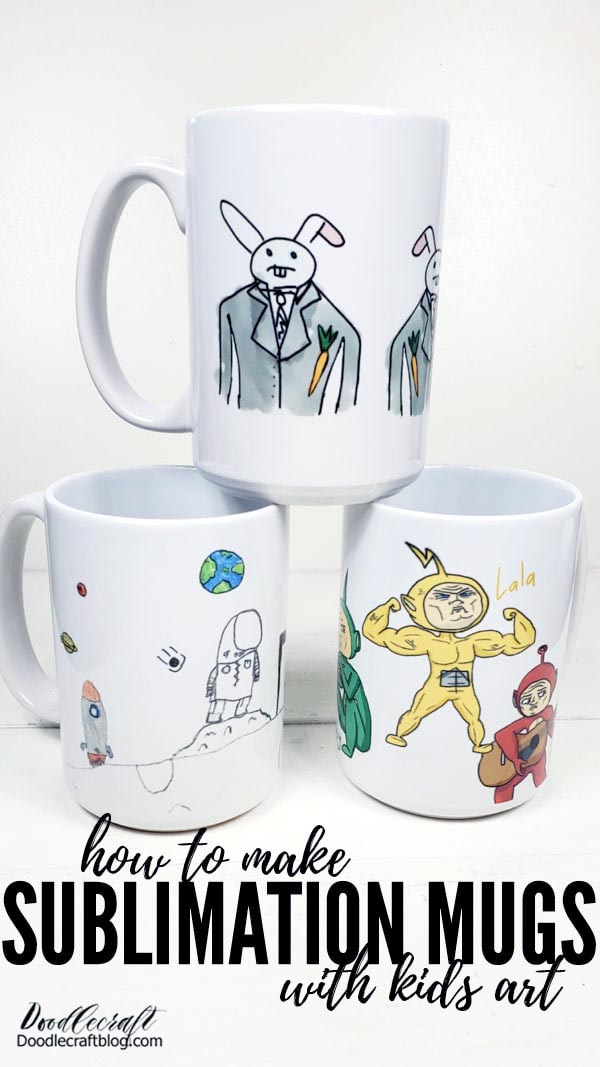
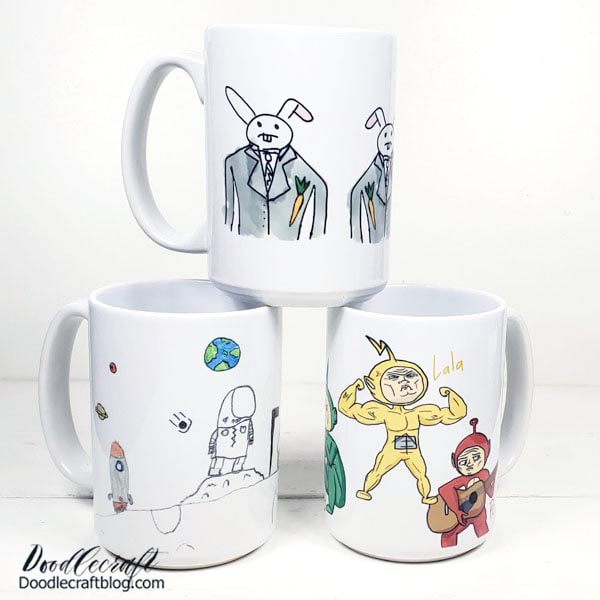
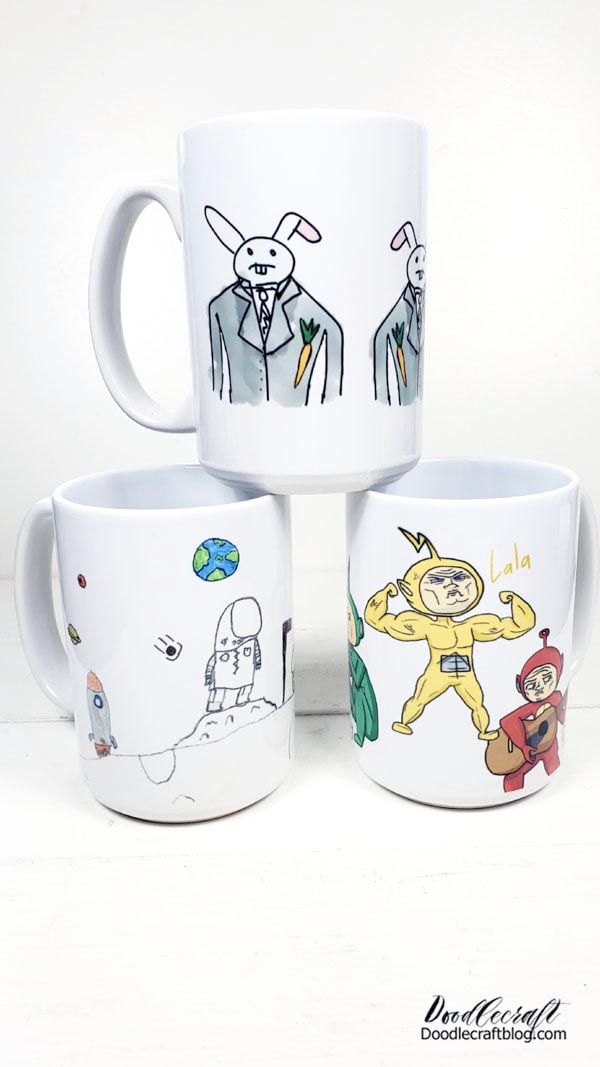
I was presented with old drawings that each of my children drew as children. I let my children open cups as their first Christmas present. Started with the eldest son. He portrays a character that we would like to call "Business Bunny". He laughed as soon as he opened it!
I repeated the image of a business bunny on the mug 3 times to fill in the space and make it funnier.
After that, I opened my cup for my baby boy. In your circle there is a little astronaut, an astronaut dog and a spaceship. I think that's the only picture my son drew and painted. I'm so glad I found this in a pile of papers!
I love how you can immediately see that he drew it with pencil and colored it with crayons!

Finally , I opened my daughter's cup. He's a YouTube host! She earns cashew art on her YouTube channel and has over 100,000 subscribers.
He saw my boys open their circles and spent years in his collection of art projects wondering what could be in his circles!?
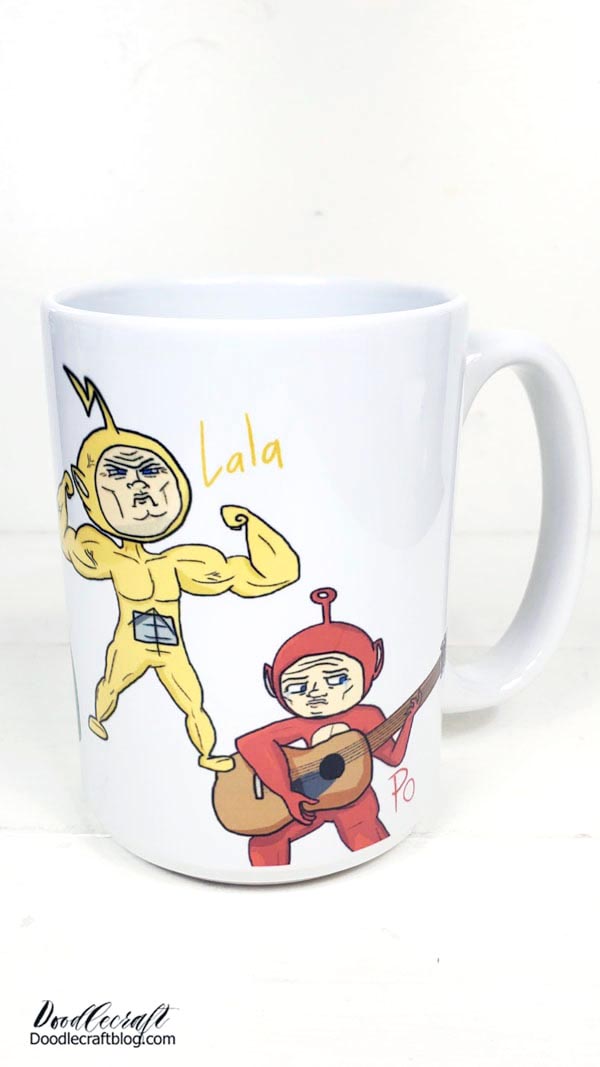
To the right! This is an awesome/emo service on Teletubbies! I really like these guys! It looks like a bag tied with a drawstring.

He paints each one separately, but I scan them and combine them into one image for fun.
You don't like it!?
Materials needed for the Ecstasy Cup with children's creativity:
Epson EcoTank ET-2760 Supertank Wireless Color Printer Without Cartridges
Blessed Sacrament
Hiipoo Ecstasy ink for Ecotank
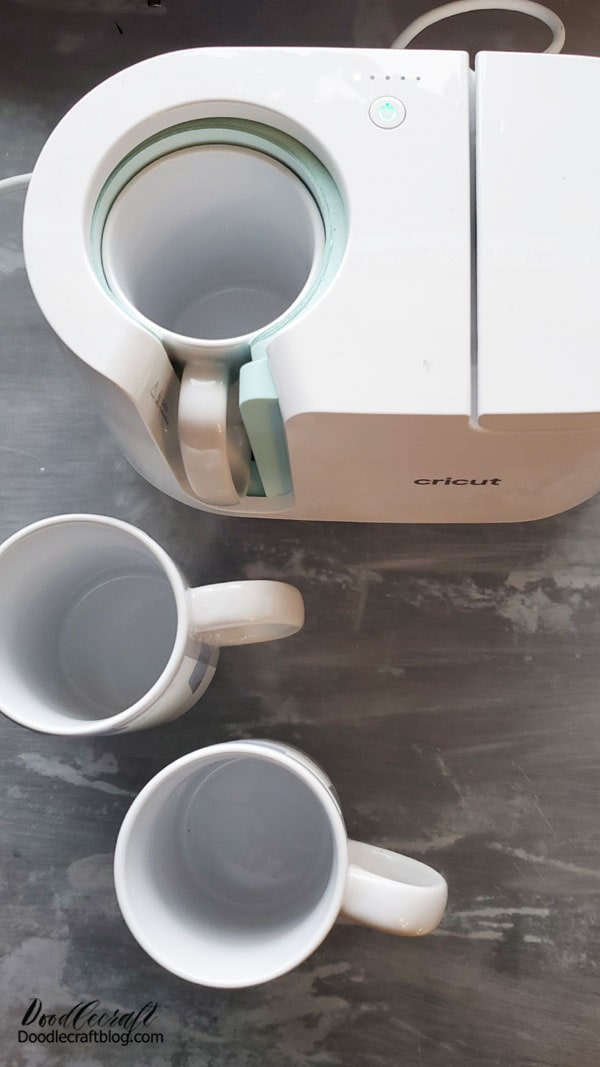
Cricut mug press
Cricut Thermal Tape
cup of happiness
Child's work (digitized, scanned or copied with subsequent printing on a sublimation printer )
Step 1: Configure your Bliss printer !
Start setting up your ecstasy printer. This requires special ink and paper. It sounds complicated, but it's actually quite simple.
Here is a complete guide to setting it up.

Step 2: Print mirror images!
Once the Bliss printer is set up, use the Bliss paper and print your photos - flip them!
Flip the images correctly horizontally so that they print in reverse order. Then when you color the mug, the text and images line up correctly.
*This is similar to using Cricut Infusible ink on mugs as in this article.
**Sublimation inks are special and heat activated so the print will be very matte. Do not worry!

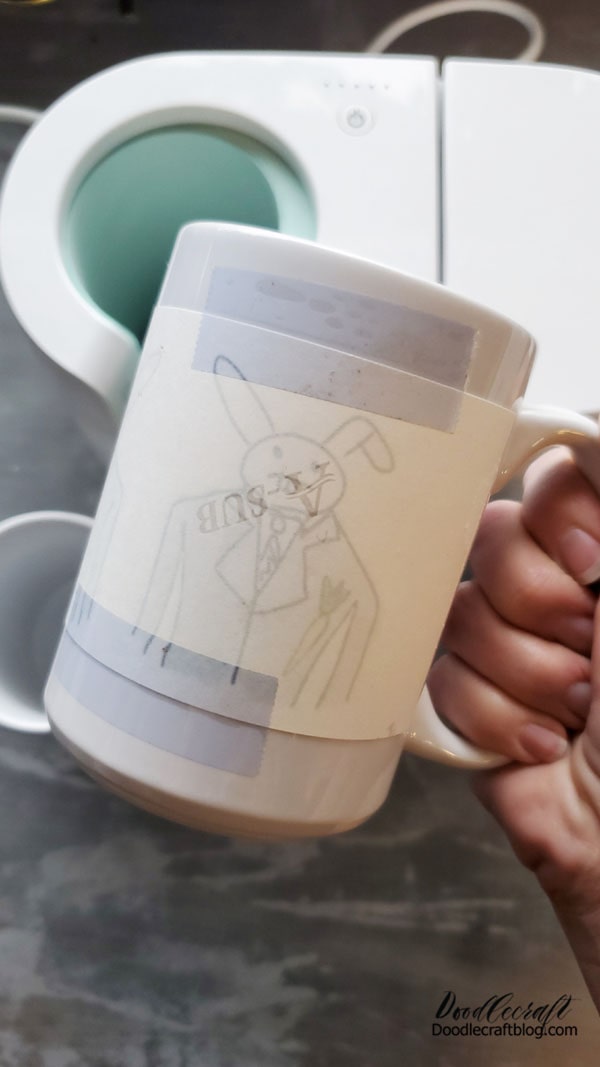
Step 3: Glue the paper cup of happiness!
Cut the paper to fit the cup. Images for these 15 ounces should be 8.5" x 4". Cup
Then touch the ceramic mug and wrap the image with the ink side. Then use heat resistant tape to secure the edges in and around the top and bottom.
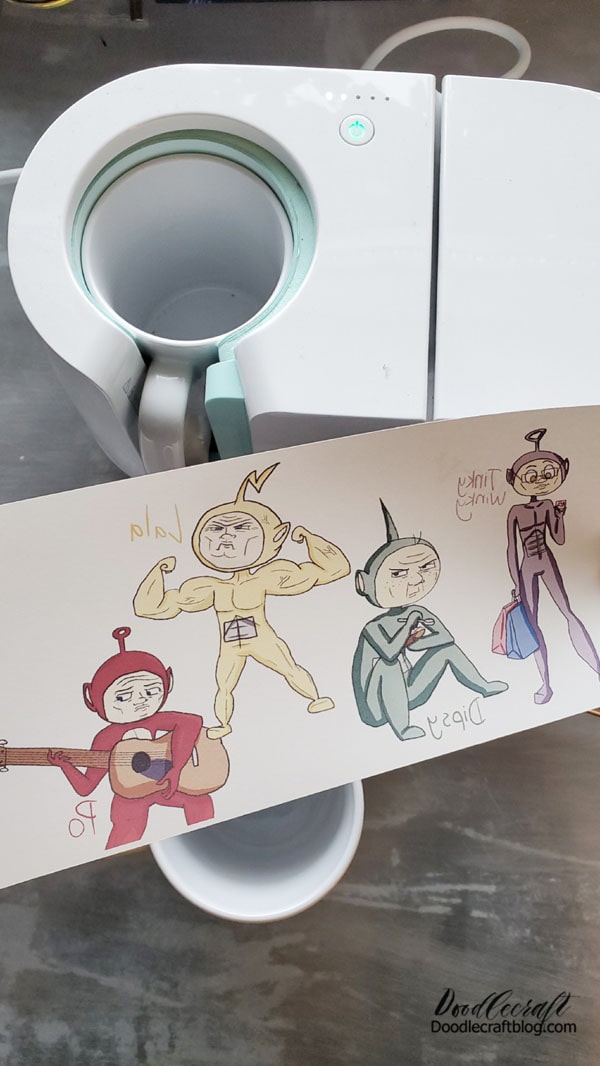
Step 4: Use a Cricut mug press!
Turn on the Cricut Mug Press and wait for it to fully heat up and give a green light indicating it is ready. If it does not start to heat up, plug it into your computer and download the updated driver.
Now insert the cup into the cricket press and close the clamp. It takes about 5 minutes to fully heat the cup and revive the image. 5 Turn on the light and wait for the device to beep. Then lower the mug and carefully remove it from the press.
It's super hot! Let cool naturally.

Repeat the heating process for as many cups as you want! This is actually a very quick project and can be done between unloading and loading the dishwasher.
Again, allow the mugs to cool completely before removing the tape and paper. It's hard to maintain, especially since you're dying to make sure it works!
I understand. Just do one thing, then take a bath, clean the house, put the cat to bed, watch a play or play...then put the paper away and see how it ended. What's left of your cup of ecstasy!
Step 5: Big Reveal!
It really is the best part of the world! On the mug, this child is delighted that the art comes to life. Peel and grate the pumpkin and squeeze out the juice.
Repeat the opening process for all of your ecstasy circles!
I inspired you to try!? This strategy is great, but there's so much more you can do with a dye- sublimation printer, so don't be afraid to invest.
There will be a big review before Christmas and I will be posting more fun articles throughout the year. The same strategy works in any Ecstasy Void, see this post for a list of great Ecstasy Voids. Make sure they are labeled "high" as they have a special finish that makes them work. Without this sky - the limit!
Shirts, pillows, tumblers, keychains, puzzles and more! Make the vacation more personal and "man-made" with photos, pictures and special memories from the past.
Is your head full of terrible ecstatic thoughts right now?
Me too.
I have lots of fun ideas, a workshop full of materials... and limited time. BUT
But I'm glad I made this Kipsack mug for my kids...or for myself.
Like, post, share and save later!