Halloween Mugs with the Cricut Mug Press

Halloween cups made from Cricut pistons
Only a month left until Halloween! I love the change of seasons... from summer heat to boulders, cool breezes and falling autumn leaves. I love the smell in the air - it smells like Halloween!
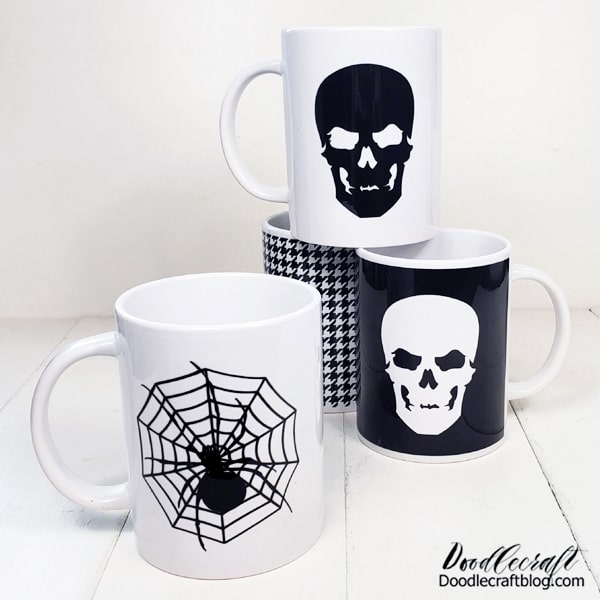
By the way, I love mugs too, so Halloween mugs are the perfect accompaniment to my hot chocolate. Let me show you how easy it is to make mugs with Cricut thermal transfer inks and a Cricut mug press . I got this product from Cricut for this post.

Mugs also make the perfect handmade gift! If you're thinking of a DIY Christmas present, this is a lifesaver! These mugs are dishwasher and microwave safe!!! Boom, a passing gift.
Initial investment was Cricut Mug Press ... but great. I have been making mugs in the oven for a year now, but this tool does everything very nicely and saves a lot of time.
or

Necessary Halloween Cup Accessories:
Cricut Maker (or equivalent machine)
fibrous roller
The Cricut mug press is easy to use! Here is a complete guide on how to get started with mug pressing.
Step 1: Cut the ink to be brewed
First select a design in the Cricut design space. I collect skulls and spiders in a web. I love that the skull frees up a shape that I can use for a second cup.
Draw the canvas by selecting a square shape, then placing it on the canvas, then unchecking the lock icon so you can resize separately. Make it 8.75 inches wide and 4 inches high.
Then add the skull image to both sides of the rectangle, crop the image together and color in, ready to crop!
Reverse image. Apply non-refillable ink to the solid base of the pen and use braid to secure it in place. Touch as little as possible.
Then select the material and cut.

Step 2: Remove opaque ink
With dry hands, gently wipe any remaining infusible ink from the backing paper. Touch the transfer ink side as little as possible, otherwise the ink will smudge. Peel off like a sticker.
Gently lift up the positive shape and you can use it as a second cup!

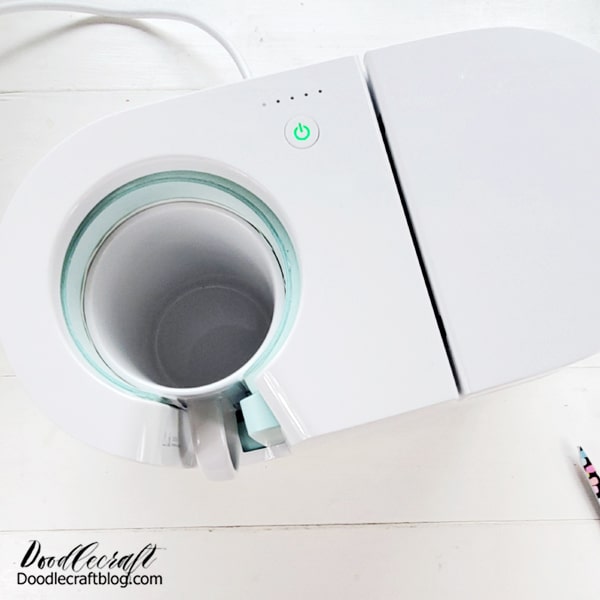
Step 3: Hold the cup
Now use a roller to remove dust and small debris from the cup. Wrap the non-fusible thermal transfer around the cup and lock it in place.
** helper icon **
The ribbon dispenser is so cute for your hot ribbon!

Step 4: Heat up the mug press
Connect the plunger of the Cricut mug . If you are doing this for the first time, you must connect it to your computer and update it before launching it. Then just turn it on and let it heat up. The indicator will turn green when ready to press.

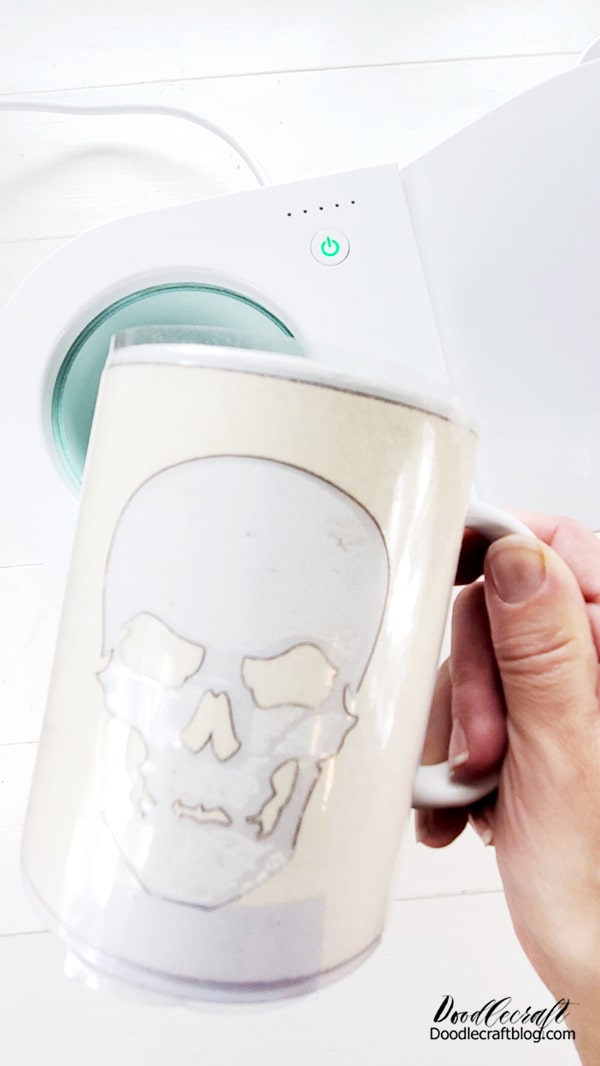
Step 5: Squeeze the Cup
Then lift the top cover and insert the cup into the slot. Then press the tongue and let it rest. The plunger of the cup will go through a row of 5 tiny lights at the top, which takes about 5 minutes. Then he squeaks.
Remove the mug and carefully remove it from the handle...the rest is very hot!
Then the most difficult thing is to let the cups cool completely.
Once the cup returns to room temperature, remove the tape and transfer it. Watch the magic unfold!
Work with the other cup until it cools down, it helps.

TA-dah! Isn't it amazing! The ink melts, becoming bright, vibrant and full of life! It is sculpted from ceramic and cannot be washed, cleaned or peeled off.
The perfect handmade gift for teachers, neighbors, friends and family! I love giving matching mugs as wedding gifts!

The best part is the time it takes. If you quickly decide on a photo, it will only take you 10 minutes or less to get rid of a few cups.
Make a cup perfect for any occasion or make a pen holder, makeup brush holder or seasonal decorations!

Here she is! any question? Feel free to ask me about Cricut at maildoodlecraft@gmail.com.
Like and share!


